What is needed before installing Android Studio?
Lecture 2 – Android Studio Setup and Project Structure
Android Studio Setup and Project Structure is the foundation of every Android developer’s journey. In this lecture, we will learn how to install Android Studio step by step, configure SDK tools, and explore how each component in the Android project works together.
Installing Android Studio & SDK Tools
Android Studio is the official IDE for Android app development designed by Google.
It provides everything you need to build, test, and debug Android apps.
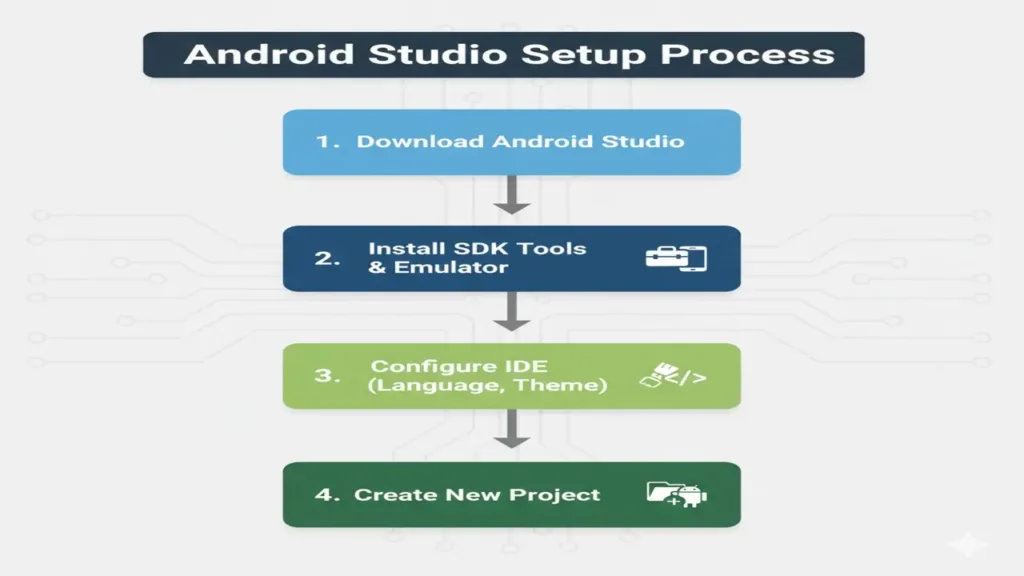
Steps to Install Android Studio:
- Download:
Visit developer.android.com/studio - Install:
Follow setup instructions and include the Android SDK, Emulator, and Virtual Device Manager (AVD). - Launch:
Open Android Studio → click “New Project” → choose Empty Activity → select language (Java or Kotlin)
Explore more fundamentals like your very first lecture:
Introduction to mobile computing.
Understanding Project Structure in Android Studio
When a new project is created, several folders and files are automatically generated.
Each plays a unique role in the app’s functionality.
Main Components:
| Folder / File | Purpose |
|---|---|
| AndroidManifest.xml | Defines app permissions, activities, and launcher icons |
| java/ | Contains source code (activities, classes, logic) |
| res/ | Stores resources (layouts, images, strings, colors) |
| Gradle Scripts | Build automation files controlling dependencies & versions |
Example Folder Structure:
MyFirstApp/
 ├── app/
 │   ├── src/
 │   │   ├── main/
 │   │   │   ├── java/
 │   │   │   │   └── com.example.myfirstapp (code)
 │   │   │   ├── res/
 │   │   │   │   ├── layout/ (XML layouts)
 │   │   │   │   ├── drawable/ (images/icons)
 │   │   │   │   └── values/ (colors, strings)
 │   │   │   └── AndroidManifest.xml
 │   └── build.gradle
 └── settings.gradle
The AndroidManifest.xml File
The AndroidManifest.xml is the blueprint of your app it declares activities, permissions, app name, and more.
Example:
<manifest package="com.example.myfirstapp">
    <application
        android:icon="@mipmap/ic_launcher"
        android:label="My First App">
        <activity android:name=".MainActivity">
            <intent-filter>
                <action android:name="android.intent.action.MAIN"/>
                <category android:name="android.intent.category.LAUNCHER"/>
            </intent-filter>
        </activity>
    </application>
</manifest>
Explanation:
package→ your app’s unique IDapplication→ main container for all activitiesintent-filter→ tells which activity launches first

Gradle – The Build System
Gradle automates building, testing, and packaging your Android app.
It manages versions, dependencies, and APK generation.
Example (build.gradle):
plugins {
    id 'com.android.application'
}
android {
    compileSdk 34
    defaultConfig {
        applicationId "com.example.myfirstapp"
        minSdk 24
        targetSdk 34
    }
}
dependencies {
    implementation 'androidx.appcompat:appcompat:1.7.0'
}
Explanation:
compileSdk→ Android version used for compilationdependencies→ external libraries usedapplicationId→ unique package name
Running Your First “Hello World” App
Once setup is complete, let’s run your first app!
Step-by-Step:
- Open Android Studio → Create New Project
- Select Empty Activity → name it
MyFirstApp - Choose Java or Kotlin
- Click Run
- Choose Emulator or Connected Device
Code Example (MainActivity.java):
package com.example.myfirstapp;
import android.os.Bundle;
import androidx.appcompat.app.AppCompatActivity;

public class MainActivity extends AppCompatActivity {
    @Override
    protected void onCreate(Bundle savedInstanceState) {
        super.onCreate(savedInstanceState);
        setContentView(R.layout.activity_main);
    }
}
activity_main.xml
<TextView
    android:layout_width="match_parent"
    android:layout_height="wrap_content"
    android:text="Hello World!"
    android:textSize="24sp"
    android:gravity="center"/>
Output:
Your emulator displays “Hello World!”
Final Thoughts
After this lecture, students can:
- Install Android Studio & SDK tools
- Identify key files: Manifest, res, Gradle
- Understand Android project structure
- Run and test a simple Hello World app
People also ask:
Install JDK and ensure your system meets the minimum requirements.
It builds the app, manages dependencies, and automates tasks.
It includes modules with code, resources, and a manifest file.